The Empire Strikes Back:
Return to Taros
Small fore warning to the readers/followers of our campaign. This is our second attempt as friends to play the Taros Campaign. So we decided to alter fluff and scenarios and armies to meet our needs. Long story short all your Imperial Armour fans don't hate us for changing stuff; just have fun!
Present Day:
The present Tau Mining World of T'ros was originally an Imperial Mining World called Taros. It became a Tau Third Sphere Expansion colony following the Tau Empire's exploitation of the Imperium of Man's distraction with the onset of the 13th Black Crusade when large numbers of Imperial forces were diverted from the Eastern Fringes of the Segmentum Ultima to the defence of Cadia and the Imperial space surrounding the Eye of Terror from the Forces of Chaos. This allowed the Tau to win the Taros Campaign
in 998.M41 for control of the planet from an Imperial force sent to
take back the world. The capital of the arid planet is the city of
Tarokeen. T'ros is today mainly inhabited by Gue'vesa (humans loyal to
the Tau Empire) who were formerly citizens of the Imperium but became turncoats because the Tau seemed to offer a better life.
The Taros Campaign:
The Original Campaign
The Taros Campaign pitched Imperial forces against the Taros Planetary Defence Force, the Tau, and their Gue'vesa and Kroot
mercenary allies in a series of battles across the surface of the
desert mining planet of Taros (T'ros). Prior to the campaign, the
Imperial Planetary Governor Lord Uphir Aulis, the head of the Taros planetary govenment, developed friendly trading relations with the Tau who desired Taros' strategic metals to build up their war machine. Ultimately the governor sought to defect with Taros to the Tau Empire
with the support of much of the planetary population once his illegal
trading with the xenos was discovered by a team sent by the Adeptus Administratum. The Administratum sought to determine if the planet's tithe of ore could be increased to meet the growing demands of the Imperial Guard for materiel to prepare for the expected 13th Black Crusade of Abaddon the Despoiler. When his treachery was unveiled, a full company of Avenging Sons Space Marines
were dispatched to kill him, but they failed in their assignment after
being intercepted by Tau bodyguards who had been secretly assigned to
the world to protect the governor. Following the assassination attempt,
the Tau officially annexed Taros while the Imperium gathered an army
made up of several regiments of the Imperial Guard to recapture the
planet. A large-scale invasion of the world followed, ending in the
defeat of the 4621st Imperial Guard Army and elements of the 3rd and 6th
Companies of the Raptors Space Marine Chapter.
This defeat is partially credited to the defection of a large
percentage of the human population of Taros to the Tau, including the
Taros Planetary Defence Forces. Taros then became T'ros, a Sept of the Tau Empire's Third Sphere Expansion and its people are now considered Gue'vesa citizens and T'ros' ores go to serve the Fire Caste's military.


Scenario 2: Attack on the Governor's Palace


At first light, the Narmenian 1st regiment began a general advance across its entire front. At the command of their officers the men rose from their quickly dug fox holes and trenches, whilst tanks reversed from their scrape holes, gunned their engines and began to grind slowly forwards. Behind them the artillery opened fire, hitting pre-selected targets all along the front. The regiments three armoured troops formed the cutting edge of the advance, with squadrons of Leman Russes and Exterminators rumbling across the desert sands.
At midday, as the combined force of 1st Narmenian troop tanks and Krieg light infantry moved along across the open desert they encounter elements of Hunter Cadre Shi'Eldi. These were the rapid response forces, which had sped to intercept the tanks. A force of hammerheads and fire warriors were tracking the imperial forces movement through pathfinder observer teams, and had arrived in the vicinity of Tungusta Station only minutes before.

This battle became typical of Tau actions all along the Imperium;s front during their offensive towards the city of Tarokeen. Rapid hard-hitting counter-attacks stalling the advance and draining the Imperial Guard of men and fighting machines before using their mobility to withdraw into the desert and disperse. Tungusta Station was not the only Tau counter-attack in the first days of the advance, but it was the hardest fought.
Denab Incident History:
While on a routine anti-pirate patrol in the Denab system Patrol Group Ravanor under the command of Captain Darillian chanced upon three unidentified non-xenos transports. The discovery of these ships eventually led to a Tauwaystation.
After a brief engagement and boarding, it was discovered that the last port of call for the transports had been Taros and upon his return Captain Darillian filed a full report.
When Auditor Prime Dree, who had been tasked with locating more minerals for the Forge World Stygies VIII, discovered the report detailing the Denab Incident, it confirmed his suspicions regarding missing minerals that he had first noted on an earlier journey to Taros. This more complete picture was again filed in a report and eventually led to the First Taros Intervention and the Taros Campaign.
Present Day Denab:
 |
| Tau Waystation |
This time the Imperial Navy knew what to expect in Taros and its surrounding subspace. Under command of the 24th Krieg Navy Expeditionary Force a small Vanguard led by Captain Hartley of the 9th Company Blood Angles arrived out of the warp near the Denab system. Much like Patrol Group Ravanor years prior, the 24th KMEU Vanguard was able to catch a small Tau and human coalition supply convoy docked at a Tau waystation.
Scenario 1: Denab
Objectives:
The Imperial player must destroy the Tau Waystation and rogue transports. He should also attempt to board at least one transport. The Tau player must escape with as many rogue transports as he can off any table edge.
 |
| Rogue Trader Ships Docked at Tau Waystation |
 |
| Strike Cruiser "Scarlet Liberty" Arrive in the Denab System |
 |
| Two 24th KMEU Falcion Escorts Arrive in Support of "Scarlet Liberty" |
 |
| Tau Patrol Group 1 |
 |
| Tau Patrol Group 2 |
 |
| Tau's First Turn, "All Ahead Full!" |
 |
| "Scarlet Liberty" and Her Escorts Open Up Destroying two of the three Rogue Traders |
 |
| Marine Sword Frigates engage and destroy the Tau Waystation |
 |
| As the Tau Patrol groups begin to push towards their wounded Transport the 24th KMEU Falcions cover the "Scarlet Liberty" while she commences boarding operations to the remaining transport. |
Objectives:
The Space Marines must find and kill the Planetary Governor that has been appointed by the Tau forces upon Taros. They must attempt to inflict as much damage as possible to the Tau forces garrisoned near by. The Tau should attempt to wipe out the Space Marines.
Captain Hartley knew what his company was up against. Studying the various tactics recorded by the Avengeing Sons chapter when they attempted to eradicate the human command structure on Taros years before. This time the outcome would be different, Captain Hartley had selected to do a complete drop pod assault. With the aid of chapter members that had succumb Hartley had even chosen to bring Death Company. This assault was by no means a suicide mission but Captain Hartley had every intention of laying waste to every one who had sworn their oath the Tau; man or Tau.
 |
| Blood Angels Pre Deployment |
 |
| Tau Pre Deployment |
 |
| Taros.......Quiet |
 |
| Tau loyal guard deploy |
 |
| and wait for the pending attack. |
 |
| Turn 1 the first wave of drop pods begin. |
 |
| a second drop pod |
 |
| a third crashes down |
 |
| Assault Marines aboard a fourth drop pod arrive |
 |
| a fifth drop pod |
 |
| Death Company eradicate a guard command squad |
 |
| The Tau have arrived! |
 |
| Railguns make short work of dreadnoughts |
 |
| With the Objectives secured(killed) the Blood Angels grasp success even in the over bearing number of Tau reinforcements. |
Scenario 3: Assault on Missile Silo Decima.
Missile silo Decima was the single greatest threat to the invasion task force, and it fell to the Raptors Chapter to destroy the silos before the main task force could land and begin to take back Taros. The attack involved the whole 3rd Company mounted on bikes deploying from Thunderhawk gunships and then moving to contact with the forces guarding Decima that were loyal to both the Governor and the Tau.
Objective:
The Space Marines must destroy the missile silo before the missile launches. From the end of the defenders turn 4 onwards, roll to see if the missile is prepped and ready to launch.
 |
| Decima Silo Compound |
 |
| Raptors 3rd Company |
 |
| Traitor Guard Force at Decima Compound |
 |
| Deployment |
 |
| Traitorous Cammand Squad takes autocannon shots at incoming Bikes. |
 |
| Thunderfire Cannons rain constant death on Traitor Guard through out the game. |
 |
| Devastatingly the Raptors Command squad and Bikes flee the engagement. |
 |
| Stormtalons retake air superiority. |
 |
| A single Traitor Veteran with a plasma gun takes aim and wounds the Stormtalon. |
 |
| Game ends turn 5! |
Scenario 4: Encounter at Tungusta Station.
 |
| Our 4 attempts to see who would go first hahahaha. |
 |
| Hunter Cadre Shi'Eldi |
This battle became typical of Tau actions all along the Imperium;s front during their offensive towards the city of Tarokeen. Rapid hard-hitting counter-attacks stalling the advance and draining the Imperial Guard of men and fighting machines before using their mobility to withdraw into the desert and disperse. Tungusta Station was not the only Tau counter-attack in the first days of the advance, but it was the hardest fought.
Objective:
The side with the most victory points wins. Imperial forces get 3 victory points for each of the three objectives, whilst the Tau gain 1 point for every Imperial unit killed.


Chalk up a tie for the Tau and Imperium, although I have to admit Josh and his Tau made me work for every inch of that fight. Good Game.
AIR WAR OVER TAROS
Also worrying for De Stael was the Tau's growing air
superiority. The Tau had obvious established a network of good
airfields on Taros, with smaller forward bases hidden in the deserts
and larger facilities closer to Tarokeen. The Tau had assembled an
unknown quantity of aircraft, but Air Marsal Denvelt was estimating at
least ten squadron-sized groups, maybe 120 Barracudas and 40 Tiger
Sharks. Despite losses inflicted by Imperial Navy Fighter, squadrons the
Tau were airborne relentlessly. The situation had not been helped by
the Tau raid against one of Denvelt's forward airbases and the loss of
six fighter aircraft in one night. In all the Imperial Navy had four
Fighter wings, two Bomber wings and one Tactical wing committed to the
Taros campaign. At the peak of its strength (the start of the
campaign), Air Marshal Denvelt commanded 78 fighters, of which the vast
majority were Thunderbolts, 24 Marauder bombers and 18 Valkyrie
transports (not including those of the 23rd Elysian Drop Troop
regiment). Since the campaign had started, he had received exactly zero
replacements, despite repeated requests.
 The squadrons were starting to feel the strain of prolonged
combat. As well as aircraft and aircrew losses, the fuel situation was
not good, and air dropped munitions were running low. Imperial airbases
were mostly situated far to the rear, close to the original landing
zone, where Departmento Munitorum Engineer and Labour corp had been
instructed to construct them. As the front advanced, this left the
aircraft further and further behind, with longer missions times, and
hence less time in the air over the battlefield. An original plan to
move fighter bases forwards had been cancelled. Since the Tau raid it
was considered too risky to expose grounded aircraft to roving Stealth
teams. As it was, all airbase security had been increased, with forces
being drawn from the forward Imperial Guard regiments.
The squadrons were starting to feel the strain of prolonged
combat. As well as aircraft and aircrew losses, the fuel situation was
not good, and air dropped munitions were running low. Imperial airbases
were mostly situated far to the rear, close to the original landing
zone, where Departmento Munitorum Engineer and Labour corp had been
instructed to construct them. As the front advanced, this left the
aircraft further and further behind, with longer missions times, and
hence less time in the air over the battlefield. An original plan to
move fighter bases forwards had been cancelled. Since the Tau raid it
was considered too risky to expose grounded aircraft to roving Stealth
teams. As it was, all airbase security had been increased, with forces
being drawn from the forward Imperial Guard regiments.
 The Bomber squadrons had hammered Tarokeen and the Iracunda
Isthmus with repeated air raids, pounding the city and suspected Tau
bases. It seemed to be having little effect on the Tau. Attempts to hit
Tau Hunter Cadres in the deserts seemed to expend a disproportionate
amount of munitions for slim results, and bomber losses to the
ever-present Barracudas had been alarming: five in the first two days.
In summary, the air war was (much like the ground war), slowly slipping
away from the Emperor's forces.
The Bomber squadrons had hammered Tarokeen and the Iracunda
Isthmus with repeated air raids, pounding the city and suspected Tau
bases. It seemed to be having little effect on the Tau. Attempts to hit
Tau Hunter Cadres in the deserts seemed to expend a disproportionate
amount of munitions for slim results, and bomber losses to the
ever-present Barracudas had been alarming: five in the first two days.
In summary, the air war was (much like the ground war), slowly slipping
away from the Emperor's forces.
Because of this, the Imperial Guardsmen on the ground faced the ever-present danger of low-level Barracuda attacks. The Tau aircraft slipped along low over the desert, hugging valleys and ridge lines, only to rise suddenly in a whirl of ion cannon fire, missiles and burst cannons that raked the sand and sent everybody diving for the nearest cover. Supply convoys were a priority target and suffered heavy losses. Without reinforcements the Imperial Navy was struggling to defend them. By the time Operation Comet was launched, Air Marshal Denvelt commanded just thirty-seven fighters, twelve bombers and thirteen Valkyries. Still no replacements had reached him, and none ever would.


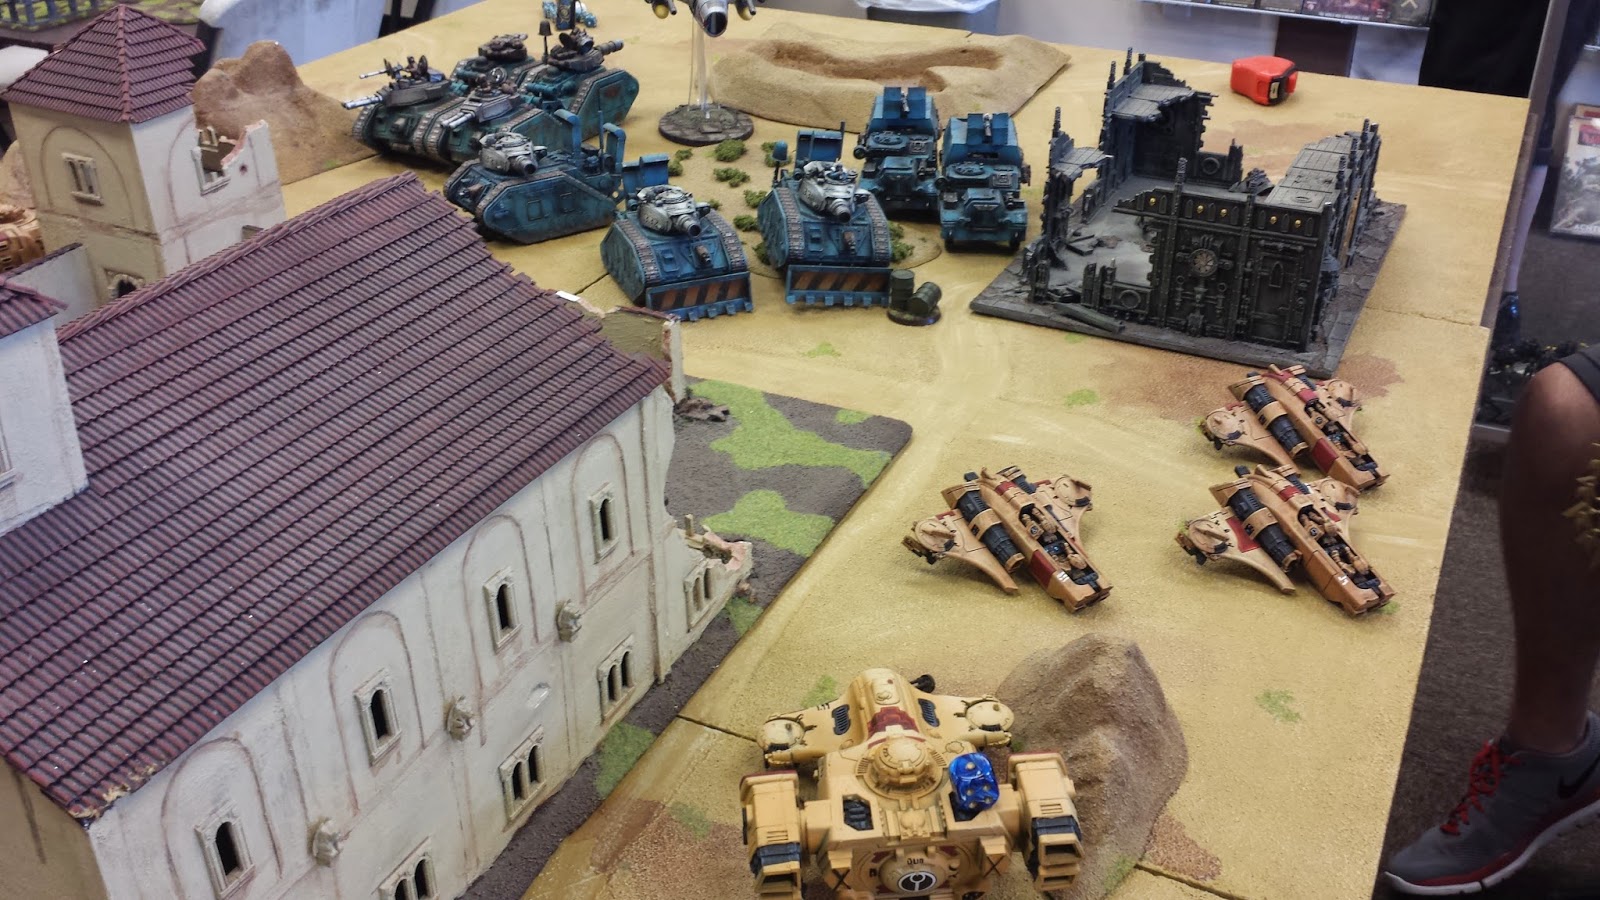
The outskirts of Giadamak provided the perfect killing grounds for armoured warfare. When the hunter Cadres and Armoured Task Force came head to head the confident Imperial Guard forces were level in decisive killing blows dealt by combined fires from both the Hammerheads and Skyray teams.
Objectives:
Simple. A pitched battle, line them up and knock them down.


Up until now the air war over Taros had continued daily, an evenly
matched duel, with both sides struggling to gain superiority. The Tau
had the edge in numbers, but the Imperium had the edge in experience.
It was a battle neither side could afford to lose. Unless the Tau
dominated the skies, their defensive strategy would be facing a major
problem. If their Barracudas could no longer protect the Hunter Cadres
then the Imperial forces would have an advantage in the ground war. The
Hunter Cadres would be exposed to repeated air attacks, and forced to
rely on their Sky Rays for defence, which were proving themselves a
potent weapon against ground targets when used in conjunction with small
Pathfinder teams. Also, Barracudas and Tiger Sharks were playing a big
part in the second phase of the campaign, strafing supply convoys. The
Imperial Navy was still putting up an alarming fight, and at this time
it was the main threat to Shas'o R'myr's campaign plan. Urgent action
was needed to help swing the balance of the air war in their favour.
The Tau launched a daring raid to destroy Imperial Navy aircraft whilst
still on the ground.

Small Stealthsuit teams had already infiltrated the Imperial Guard rear area. Operating only at night, their mission was to find and report the location of Imperial supply dumps and convoy routes. They were under strict orders not to engage the enemy, just to find potential targets for other strike forces to attack. They received new instructions: their mission was now to find the airbases. These were now the highest priority targets.
When a patrolling Stealth team reported the location of the forward airbase. Shas'el K'irri responded quickly. Utilising only his best Fire Warrior teams he gathered an elite strike force. His plan was simple but very dangerous. In a daring night-time raid, a single Orca loaded with troops would fly low over the desert and pass directly over the airstrip. The Fire Warrior teams and their support units would jump out, and under the covering fire of drones and Crisis battlesuits, destroy all the grounded aircraft with EMP grenades. Shas'el K'irri would lead the attack himself. After the drop the Orca would circle round and return to land directly on the airfield. Once the enemy aircraft were destroyed and the Orca had landed, the teams would fall back to the Orca and make a rapid escape, covered by a flight of Barracudas scrambled to intercept any Imperial pursuit. Surprise would be on their side but once the airbase realised it was under attack they would respond quickly and in force. K'irri warned all his chosen Shas'la that the chances of survival were low. They would be deep in enemy territory and should anythinq no wrong, they would be cut-off. But should they succeed then it could have dramatic effects on the front line. It was a risk worth taking for the Greater Good!


Whilst the 17th regiment fought for the Phyyra Heights and De Stael
committed the 3rd Armoured to give his offensive new momentum, the
Tau had started to infiltrate deep into enemy territory. The second
phase of their campaign plan had begun.
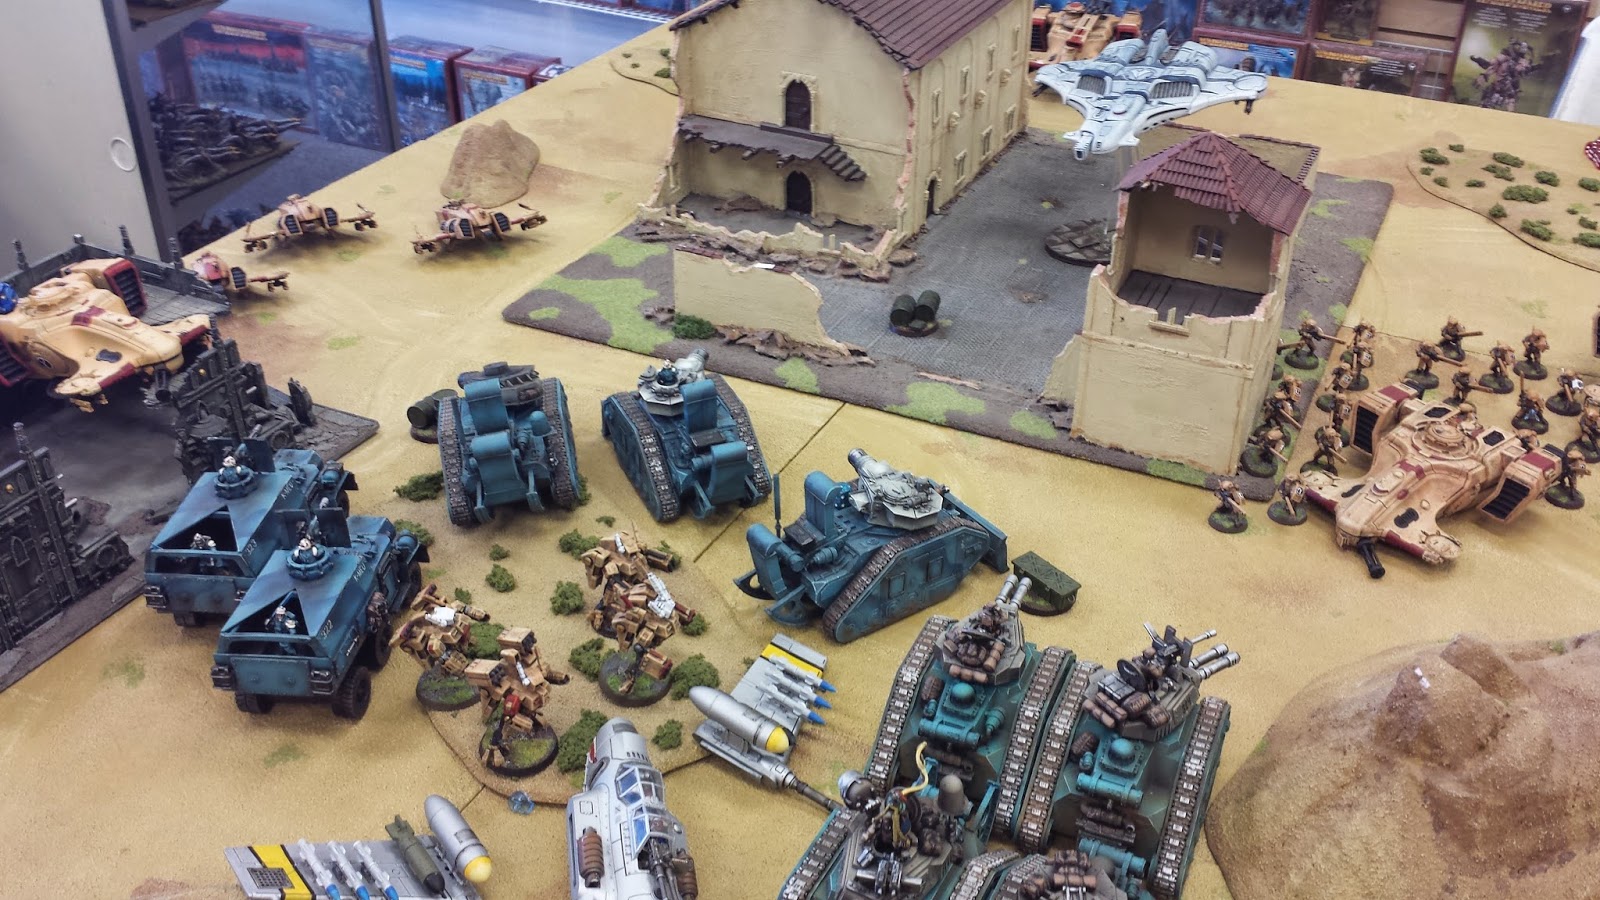
 Operating mainly at night, Tau Fire Warrior, Pathfinder and
Stealth teams dropped via Orca into the desert and fanned out in
search of targets. Night after night, Orcas flew secret transport
missions to drop more teams, seeding the Imperial Guards' rear area
with raiding parties, under orders to identify supply routes and dumps,
headquarters and airfields. Once located, then action would be
planned. Teams were only sanctioned to conduct ambushes on supply
routes. Other Pathfinder teams were dropped with Tetra speeders,
allowing them to move with great speed to each new target.
Operating mainly at night, Tau Fire Warrior, Pathfinder and
Stealth teams dropped via Orca into the desert and fanned out in
search of targets. Night after night, Orcas flew secret transport
missions to drop more teams, seeding the Imperial Guards' rear area
with raiding parties, under orders to identify supply routes and dumps,
headquarters and airfields. Once located, then action would be
planned. Teams were only sanctioned to conduct ambushes on supply
routes. Other Pathfinder teams were dropped with Tetra speeders,
allowing them to move with great speed to each new target.
Pathfinder and Stealth teams operated in unison to attack Imperial Guard supply columns of Trojans towing trailers full of water, fuel and ammunition. Rear area security was mainly being conducted by Sentinel and Rough Rider squadrons, and these proved ineffective against the small, well-armed Tau teams. Day after day, convoy══ after convoy was ambushed. The Pathfinders inflicting rapid loses before withdrawing back into the desert. Soon, supply routes were marked by the blackened hulks of destroyed Trojans and trailers, or the slowly bleaching bones of horses killed in ambushes. Security was increased. Armoured Fist squads were withdrawn from frontline duly to help defend the vulnerable convoys, but the Tau attacks continued.


 |
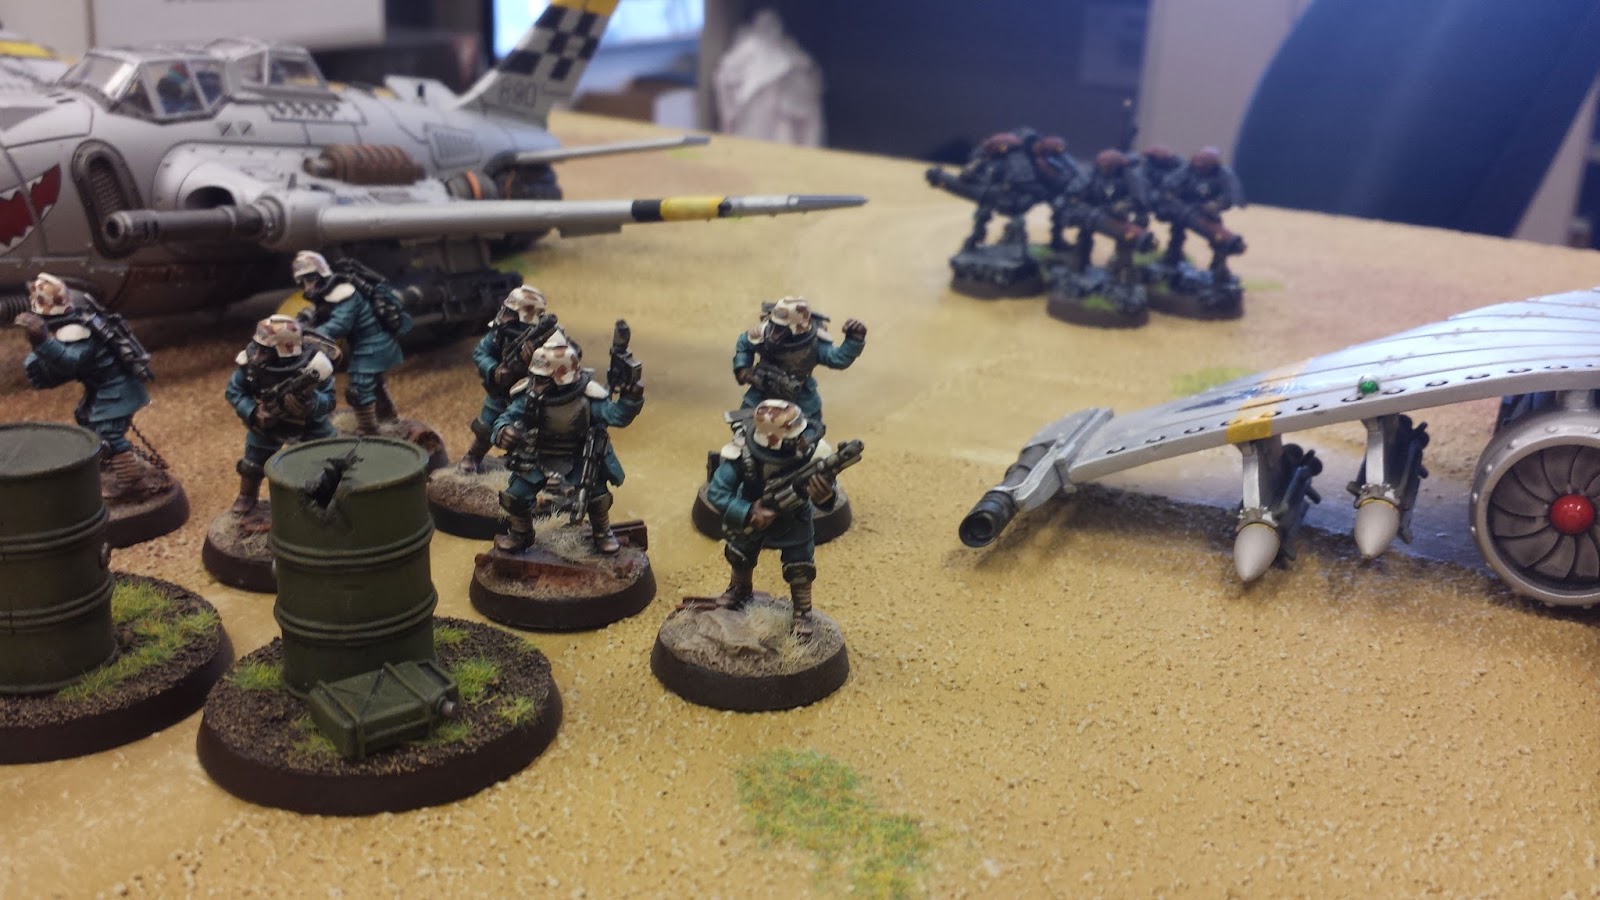
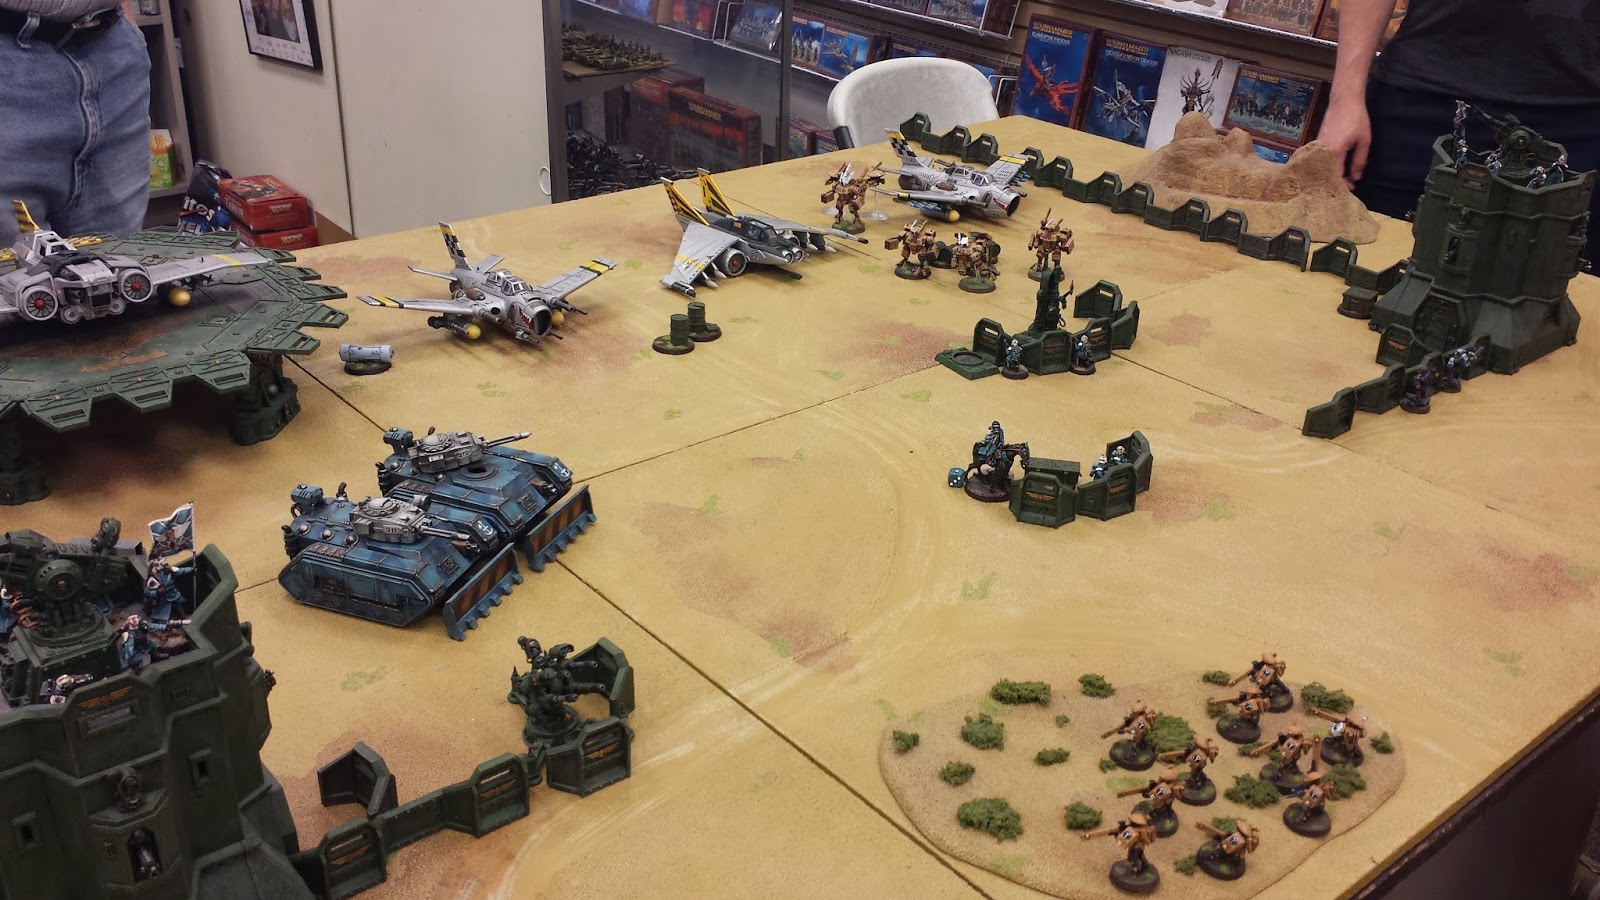
| 1st Narmenian Task Force |
 |
| Barracuda makes very short work of the Lightning fighter |
 |
| 1st Narmenian Task Force survivors |
 |
| Hunter Cadre Shi'Eldi survivors |
Scenario 5: Tau Bombing Run
Because of this, the Imperial Guardsmen on the ground faced the ever-present danger of low-level Barracuda attacks. The Tau aircraft slipped along low over the desert, hugging valleys and ridge lines, only to rise suddenly in a whirl of ion cannon fire, missiles and burst cannons that raked the sand and sent everybody diving for the nearest cover. Supply convoys were a priority target and suffered heavy losses. Without reinforcements the Imperial Navy was struggling to defend them. By the time Operation Comet was launched, Air Marshal Denvelt commanded just thirty-seven fighters, twelve bombers and thirteen Valkyries. Still no replacements had reached him, and none ever would.
Objective:
Tau forces must cause maximum damage to the city before escaping off the board.A decisive Tau victory!
Scenario 6: The Battle at Giadamak Part 1
Giadamak was a huge strip mine where the ground had been torn up
over centuries, its deep quarries leaving dramatic rends in the earth
and huge, strangely regular mounds of waste rock piled high. If was a
desolate and dusty place, home to several thousand miners until the
approaching lank columns forced most to flee to safety. Some hardly
work-gangs vowed to stay and fight. The scattered quarries, buildings,
workings and equipment hid the defenders. The deserts provided little
cover for the attackers. Where once the clanking and grinding of heavy
machinery had rumbled across the desert, all was now silent. Fire
Warriors scanned the southern horizon for the tell tale dust columns of
the approaching tanks.
 Lord Marshal De Stael suggested that General Ras-Aziz
ignore the tricky mining complex and move around it, striking for the
bigger prize of the Iracunda Isthmus, and leaving the defenders
isolated. The General disagreed. He could not allow a strong Tau force
to remain behind his front line. His lead units might reach the
Iracunda Isthmus, but the Giadamak defenders could then launch a
potentially catastrophic counter-attack from their strong point rollinq
through the regiment's vulnerable rear areas. In his opinion the mine
must be seized and the defenders killed, captured or forced to
withdraw. An attack would clear the way for the continued advance
northwards. The veteran Tallarn General made this clear during a
briefing onboard De Stael's Leviathon. The Lord Marshal concurred with
his front line commander. The attack would begin at first light next
day.
Lord Marshal De Stael suggested that General Ras-Aziz
ignore the tricky mining complex and move around it, striking for the
bigger prize of the Iracunda Isthmus, and leaving the defenders
isolated. The General disagreed. He could not allow a strong Tau force
to remain behind his front line. His lead units might reach the
Iracunda Isthmus, but the Giadamak defenders could then launch a
potentially catastrophic counter-attack from their strong point rollinq
through the regiment's vulnerable rear areas. In his opinion the mine
must be seized and the defenders killed, captured or forced to
withdraw. An attack would clear the way for the continued advance
northwards. The veteran Tallarn General made this clear during a
briefing onboard De Stael's Leviathon. The Lord Marshal concurred with
his front line commander. The attack would begin at first light next
day.
The briefing complete General Ras-Aziz climbed aboard an Aquila shuttle and flew back to his forward command post to oversee the battle.
 As the first rays of light crept over the dark horizon, the
rumble of heavy artillery fire once again rolled out across the
desert. In the dawn light. Earthshaker and mortar explosions blossomed
all around Giadamak. The men gathered ammunition, ration supplies and
filled canteens before climbing aboard their vehicles and slowly moving
to the start lines. The regiment's attack plan was simple. Two Tank
companies would envelope the mines, circling to the west and east. When
the tank vanguards had met, the mine would be surrounded and cut oft
from reinforcements. Then the infantry would move in. racing forwards in
Chimeras behind a rolling barrage of artillery fire, before
dismounting and closing the last few hundred yards on loot. It would be
the dismounted infantry that would roust the Tau from their hidden
positions in close quarters fighting, under the covering fire of their
transports.
As the first rays of light crept over the dark horizon, the
rumble of heavy artillery fire once again rolled out across the
desert. In the dawn light. Earthshaker and mortar explosions blossomed
all around Giadamak. The men gathered ammunition, ration supplies and
filled canteens before climbing aboard their vehicles and slowly moving
to the start lines. The regiment's attack plan was simple. Two Tank
companies would envelope the mines, circling to the west and east. When
the tank vanguards had met, the mine would be surrounded and cut oft
from reinforcements. Then the infantry would move in. racing forwards in
Chimeras behind a rolling barrage of artillery fire, before
dismounting and closing the last few hundred yards on loot. It would be
the dismounted infantry that would roust the Tau from their hidden
positions in close quarters fighting, under the covering fire of their
transports.
 The attack started well, with the tanks moving out to the
left and right unmolested by Tau fire. With the crack of artillery
still resounding the Leman Russ columns bounded forwards in two wide
arcs. In the centre, the Chimeras advanced in line abreast behind a
wall of Earthshaker fire. With two hundred yards left, the artillery
screen lifted and men dismounted to dash forwards and seize the
objective. As the infantry closed in the Tau opened fire, flaying the
dismounted Tallarns with pulse rifle fire. The Tau had created a killing
zone in front of their position with interlocking fields of fire. The
leading Tallarn infantry were now caught in it, and men started to fall
one after the other. As they attempted to advance, the men of Tallarn
were dusty tan shapes running, falling, crawling, firing, rising again
and fall again, wounded and writhing The heavy pulse fire was
punishing. Soon the flat ground was littered with the small hummocks of
dead and wounded men. Second company, the first to attack, was
repulsed with heavy loses. They retreated in disarray leaving a hundred
dead behind.
The attack started well, with the tanks moving out to the
left and right unmolested by Tau fire. With the crack of artillery
still resounding the Leman Russ columns bounded forwards in two wide
arcs. In the centre, the Chimeras advanced in line abreast behind a
wall of Earthshaker fire. With two hundred yards left, the artillery
screen lifted and men dismounted to dash forwards and seize the
objective. As the infantry closed in the Tau opened fire, flaying the
dismounted Tallarns with pulse rifle fire. The Tau had created a killing
zone in front of their position with interlocking fields of fire. The
leading Tallarn infantry were now caught in it, and men started to fall
one after the other. As they attempted to advance, the men of Tallarn
were dusty tan shapes running, falling, crawling, firing, rising again
and fall again, wounded and writhing The heavy pulse fire was
punishing. Soon the flat ground was littered with the small hummocks of
dead and wounded men. Second company, the first to attack, was
repulsed with heavy loses. They retreated in disarray leaving a hundred
dead behind.
 His first assault defeated, General Ras-Aziz ordered a fresh
Armoured Fist company forwards. This time it would be third company's
turn. Again muzzle flashes erupted from the defenders' lines, scouring
the desert with pulse rounds. Chimeras moved forwards to lend their
tire, multi-lasers whining, heavy boilers chattering return fire.
Leading the attack was Captain Hadid. His own Chimera was hit thirty
five limes by pulse rounds, eventually penetrating the front armour and
killing his driver. Dismounting, the captain rallied his men and led
the way, closing in on the objective. The weight of Chimera tire and
the platoon's supporting mortars was having an effect, suppressing the
defenders as the first Tallarn platoons reached the edge of Giadamak.
Now the fighting would become close and personal. With knives and
grenades in hand, squads were stalking through the billowing smoke and
rusting machinery, hunting down the entrenched defenders.
His first assault defeated, General Ras-Aziz ordered a fresh
Armoured Fist company forwards. This time it would be third company's
turn. Again muzzle flashes erupted from the defenders' lines, scouring
the desert with pulse rounds. Chimeras moved forwards to lend their
tire, multi-lasers whining, heavy boilers chattering return fire.
Leading the attack was Captain Hadid. His own Chimera was hit thirty
five limes by pulse rounds, eventually penetrating the front armour and
killing his driver. Dismounting, the captain rallied his men and led
the way, closing in on the objective. The weight of Chimera tire and
the platoon's supporting mortars was having an effect, suppressing the
defenders as the first Tallarn platoons reached the edge of Giadamak.
Now the fighting would become close and personal. With knives and
grenades in hand, squads were stalking through the billowing smoke and
rusting machinery, hunting down the entrenched defenders.
Meanwhile, the encircling tanks had completed their envelopment against only light resistance. They took up positions to repel any attempted Tau breakthrough to help the force now surrounded amongst the deep quarries of Giadamak. There was little the tank commanders could do as, in mid-afternoon, the Tau launched an aerial evacuation. From the east a formation of four Orcas, surrounded by a defensive shield of Barracudas, raced overhead, banked steeply towards the mine and came in to land. The Tau were withdrawing again.
 Fighting amongst the quarries was more like street fighting
than desert warfare. The artillery could no longer fall as the forces
were too close and intermingled. For three hours the battle was a brawl
fought with grenades, knives and sometimes bare fists. The Tau had
little stomach for such combat. The Hunter Cadre commander had called
for an evacuation. He had inflicted his damage here, it was now time to
cut-and-run before his force was annihilated.
Fighting amongst the quarries was more like street fighting
than desert warfare. The artillery could no longer fall as the forces
were too close and intermingled. For three hours the battle was a brawl
fought with grenades, knives and sometimes bare fists. The Tau had
little stomach for such combat. The Hunter Cadre commander had called
for an evacuation. He had inflicted his damage here, it was now time to
cut-and-run before his force was annihilated.
 The Orcas swooped in. burst cannons raking the sand and═ the
Fire Warrior teams withdrew under the covering fire of their
sacrificial rearguard. Scurrying away they loaded up and quickly took
to the air. From his command post. General Ras-Aziz watched through
magnoculars as one by one the Orcas lifted off and banked away
northwards, chased by sporadic Hydra flak═ fire, whilst Barracudas
circled above.
The Orcas swooped in. burst cannons raking the sand and═ the
Fire Warrior teams withdrew under the covering fire of their
sacrificial rearguard. Scurrying away they loaded up and quickly took
to the air. From his command post. General Ras-Aziz watched through
magnoculars as one by one the Orcas lifted off and banked away
northwards, chased by sporadic Hydra flak═ fire, whilst Barracudas
circled above.
 The survivors of Giadamak moved to mop up the Tau
rearguard, quickly rounding up the haggard, wounded and battle-weary
alien prisoners. In all, sixty three prisoners were taken. The 3rd
Tallarn regiment's losses stood at 322 killed or wounded and eleven
vehicles destroyed. That evening, sixty-eight Tau bodies were piled
into a single mass grave and bulldozed over. After a day of heavy
fighting Giadamak was now a fire scoured wilderness, dotted with
artillery impact craters, littered with spent powercells, bloody
bandages, smouldering wreckage and the dead of both sides.
The survivors of Giadamak moved to mop up the Tau
rearguard, quickly rounding up the haggard, wounded and battle-weary
alien prisoners. In all, sixty three prisoners were taken. The 3rd
Tallarn regiment's losses stood at 322 killed or wounded and eleven
vehicles destroyed. That evening, sixty-eight Tau bodies were piled
into a single mass grave and bulldozed over. After a day of heavy
fighting Giadamak was now a fire scoured wilderness, dotted with
artillery impact craters, littered with spent powercells, bloody
bandages, smouldering wreckage and the dead of both sides.
 After another fourteen days of advancing, faced by daily
Tau sniping, the front line, led by Battlegroup═ A, had closed to
within fifty kilometres of the objective. But they too were now running
out of tanks, fuel and water.
After another fourteen days of advancing, faced by daily
Tau sniping, the front line, led by Battlegroup═ A, had closed to
within fifty kilometres of the objective. But they too were now running
out of tanks, fuel and water.
As the front line pushed forwards the lengthening supply lines felt the pressure. The second phase of Shas'o R'myr's═ campaign plan was starting to reap its rewards. With so many units committed to the rear echelon raids, the Tau commander might no longer have enough Hunter Cadres to stop the offensive, but the Imperial Guard was slowly running out of momentum due to its own logistical needs.
The briefing complete General Ras-Aziz climbed aboard an Aquila shuttle and flew back to his forward command post to oversee the battle.
Meanwhile, the encircling tanks had completed their envelopment against only light resistance. They took up positions to repel any attempted Tau breakthrough to help the force now surrounded amongst the deep quarries of Giadamak. There was little the tank commanders could do as, in mid-afternoon, the Tau launched an aerial evacuation. From the east a formation of four Orcas, surrounded by a defensive shield of Barracudas, raced overhead, banked steeply towards the mine and came in to land. The Tau were withdrawing again.
As the front line pushed forwards the lengthening supply lines felt the pressure. The second phase of Shas'o R'myr's═ campaign plan was starting to reap its rewards. With so many units committed to the rear echelon raids, the Tau commander might no longer have enough Hunter Cadres to stop the offensive, but the Imperial Guard was slowly running out of momentum due to its own logistical needs.
Objective:
Tau forces must escape off either short table edge (within 6") and survive until turn 5. |
| Turn 1 crisis suits blast a leman russ to bits. |
Sceanrio 7: The Outskirts of Giadamak (Kursk)
The outskirts of Giadamak provided the perfect killing grounds for armoured warfare. When the hunter Cadres and Armoured Task Force came head to head the confident Imperial Guard forces were level in decisive killing blows dealt by combined fires from both the Hammerheads and Skyray teams.
Objectives:
Simple. A pitched battle, line them up and knock them down.
Scenario 8 : Night Raiders
Small Stealthsuit teams had already infiltrated the Imperial Guard rear area. Operating only at night, their mission was to find and report the location of Imperial supply dumps and convoy routes. They were under strict orders not to engage the enemy, just to find potential targets for other strike forces to attack. They received new instructions: their mission was now to find the airbases. These were now the highest priority targets.
When a patrolling Stealth team reported the location of the forward airbase. Shas'el K'irri responded quickly. Utilising only his best Fire Warrior teams he gathered an elite strike force. His plan was simple but very dangerous. In a daring night-time raid, a single Orca loaded with troops would fly low over the desert and pass directly over the airstrip. The Fire Warrior teams and their support units would jump out, and under the covering fire of drones and Crisis battlesuits, destroy all the grounded aircraft with EMP grenades. Shas'el K'irri would lead the attack himself. After the drop the Orca would circle round and return to land directly on the airfield. Once the enemy aircraft were destroyed and the Orca had landed, the teams would fall back to the Orca and make a rapid escape, covered by a flight of Barracudas scrambled to intercept any Imperial pursuit. Surprise would be on their side but once the airbase realised it was under attack they would respond quickly and in force. K'irri warned all his chosen Shas'la that the chances of survival were low. They would be deep in enemy territory and should anythinq no wrong, they would be cut-off. But should they succeed then it could have dramatic effects on the front line. It was a risk worth taking for the Greater Good!
 |
| Pre Deployment peace |
 |
| The Tau Night Raiders |
Scenario 9: Supply Convoy Ambush
Operating mainly at night, Tau Fire Warrior, Pathfinder and
Stealth teams dropped via Orca into the desert and fanned out in
search of targets. Night after night, Orcas flew secret transport
missions to drop more teams, seeding the Imperial Guards' rear area
with raiding parties, under orders to identify supply routes and dumps,
headquarters and airfields. Once located, then action would be
planned. Teams were only sanctioned to conduct ambushes on supply
routes. Other Pathfinder teams were dropped with Tetra speeders,
allowing them to move with great speed to each new target.Pathfinder and Stealth teams operated in unison to attack Imperial Guard supply columns of Trojans towing trailers full of water, fuel and ammunition. Rear area security was mainly being conducted by Sentinel and Rough Rider squadrons, and these proved ineffective against the small, well-armed Tau teams. Day after day, convoy══ after convoy was ambushed. The Pathfinders inflicting rapid loses before withdrawing back into the desert. Soon, supply routes were marked by the blackened hulks of destroyed Trojans and trailers, or the slowly bleaching bones of horses killed in ambushes. Security was increased. Armoured Fist squads were withdrawn from frontline duly to help defend the vulnerable convoys, but the Tau attacks continued.


No comments:
Post a Comment